 Idex
IdexTutorial
Set up Idex, step by step
From install to your first fix in a few minutes, then what to check each week. The screenshots use a sample store.
Step 1: Install Idex
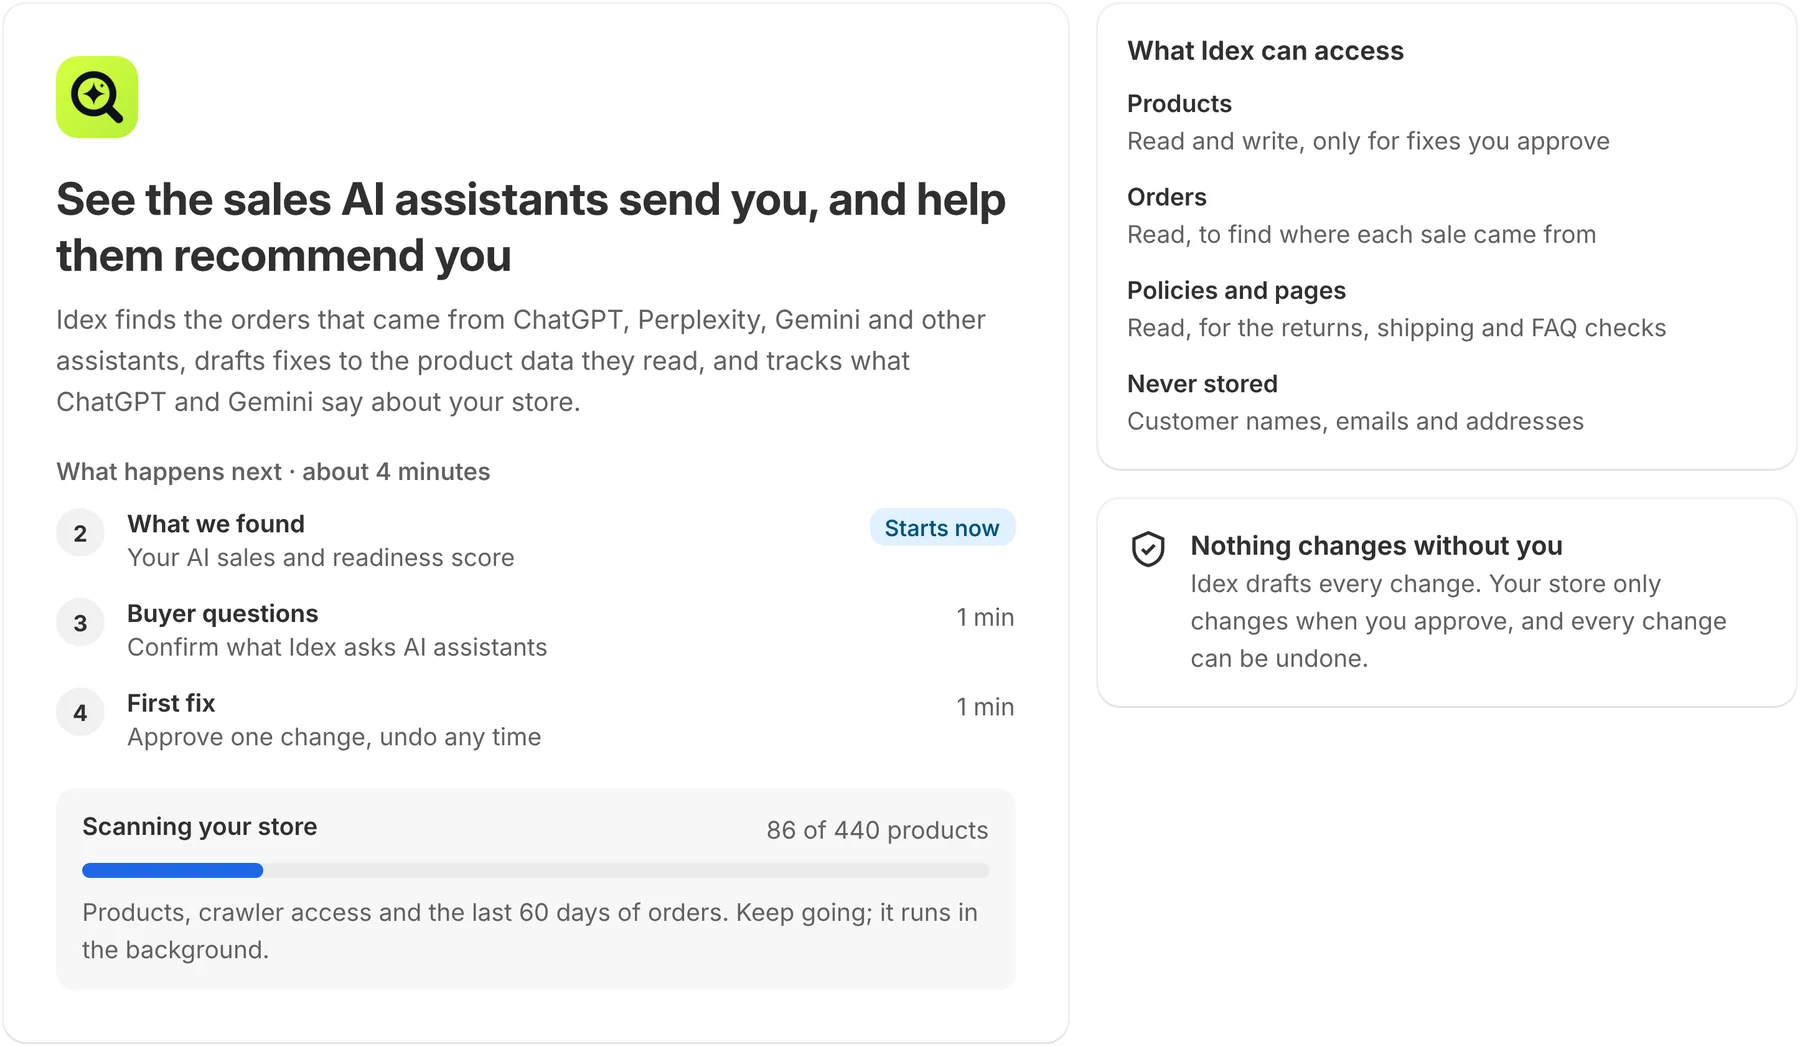
Find Idex on the Shopify App Store and press Install. Shopify shows the access Idex asks for; approve it, and Idex opens in your Shopify admin. Later, you’ll find it under Apps.
Step 2: Let the scan start
Setup opens on Welcome, and your store scan has already started. Idex reads your products, your AI crawler access and the last 60 days of orders in the background. The scan only reads; it doesn’t change your products.
Press Continue. You don’t have to wait for the scan.
Step 3: See what Idex found
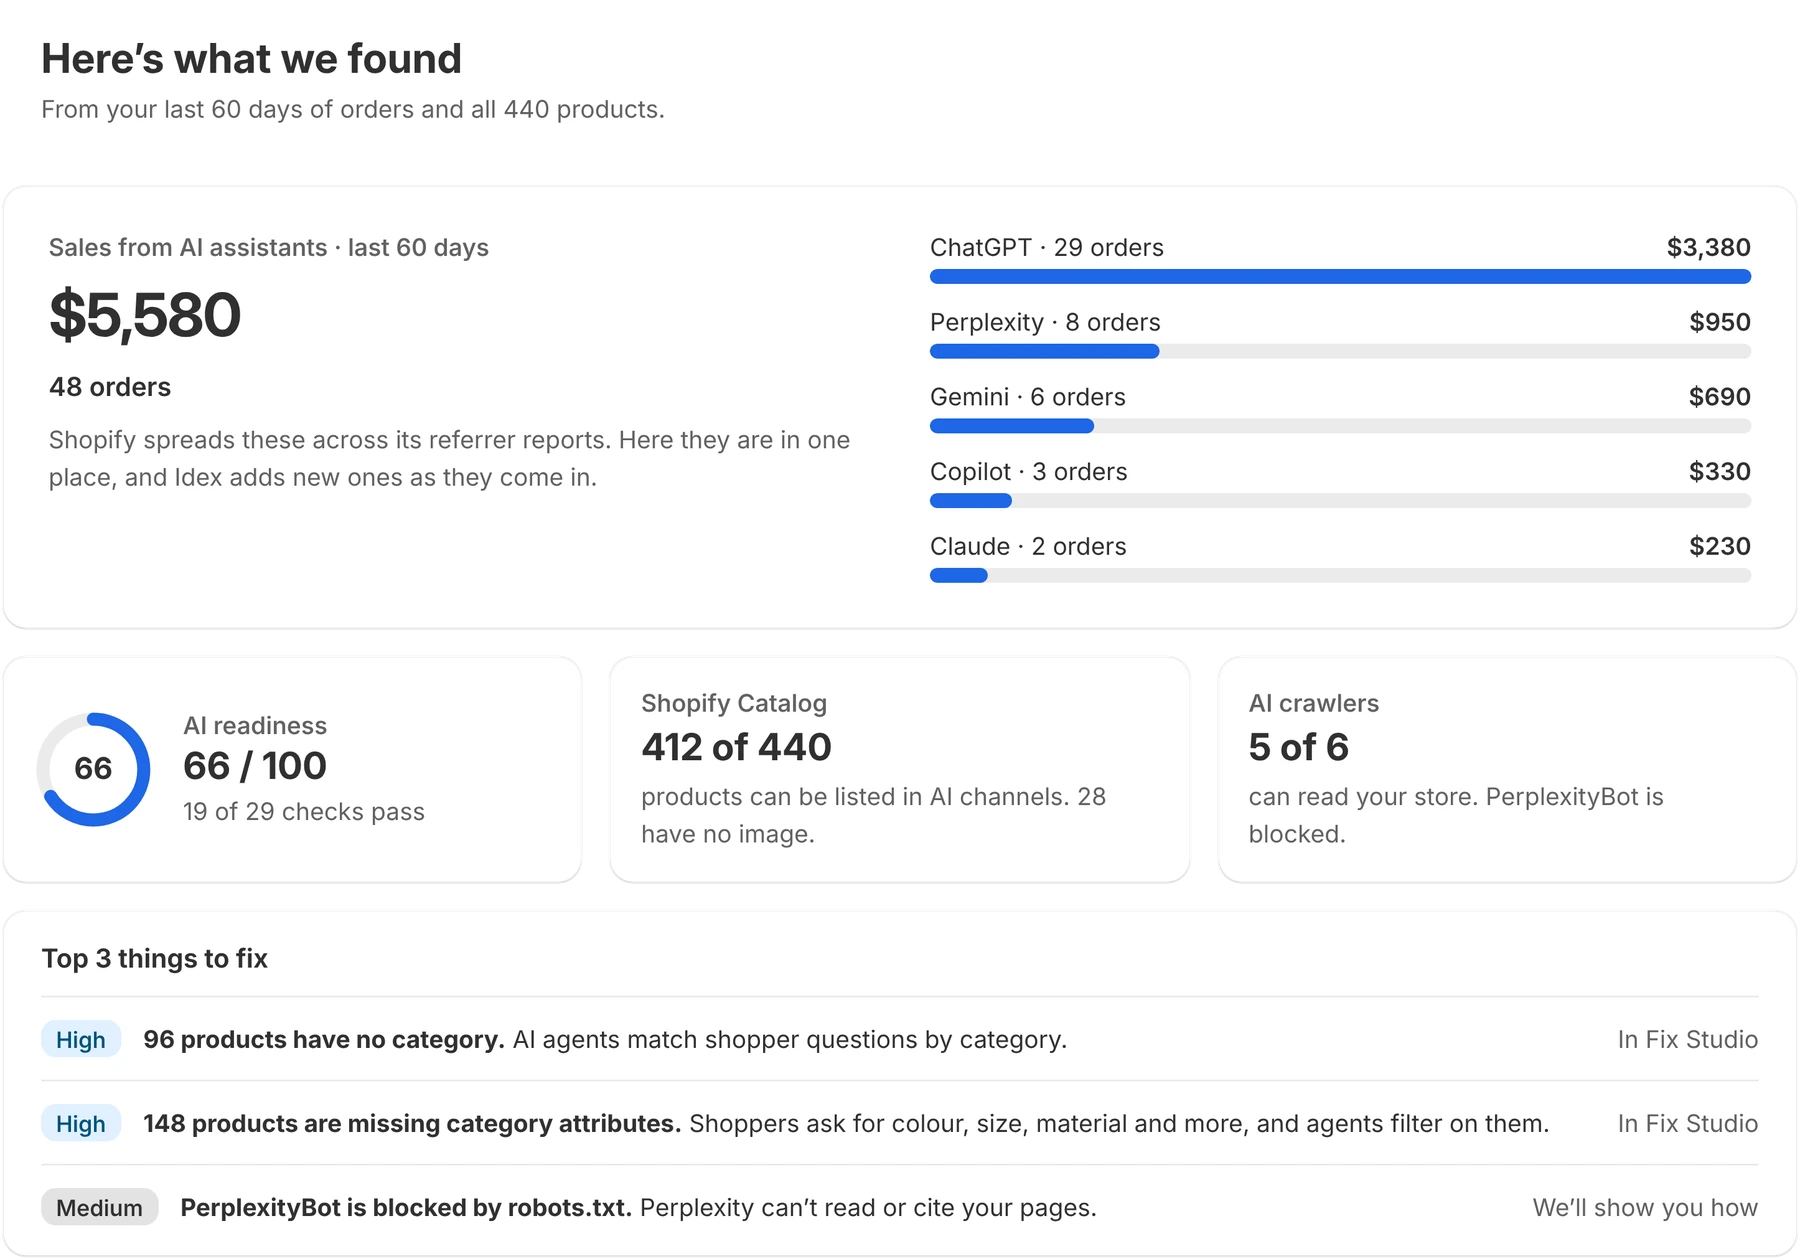
What we found shows your sales from AI assistants in the last 60 days, your AI readiness score, how many products can be listed in Shopify Catalog, how many AI crawlers can read your store, and the three things to fix first.
If the scan is still running, press Continue while it runs. The results also appear on Home.
Step 4: Confirm your buyer questions
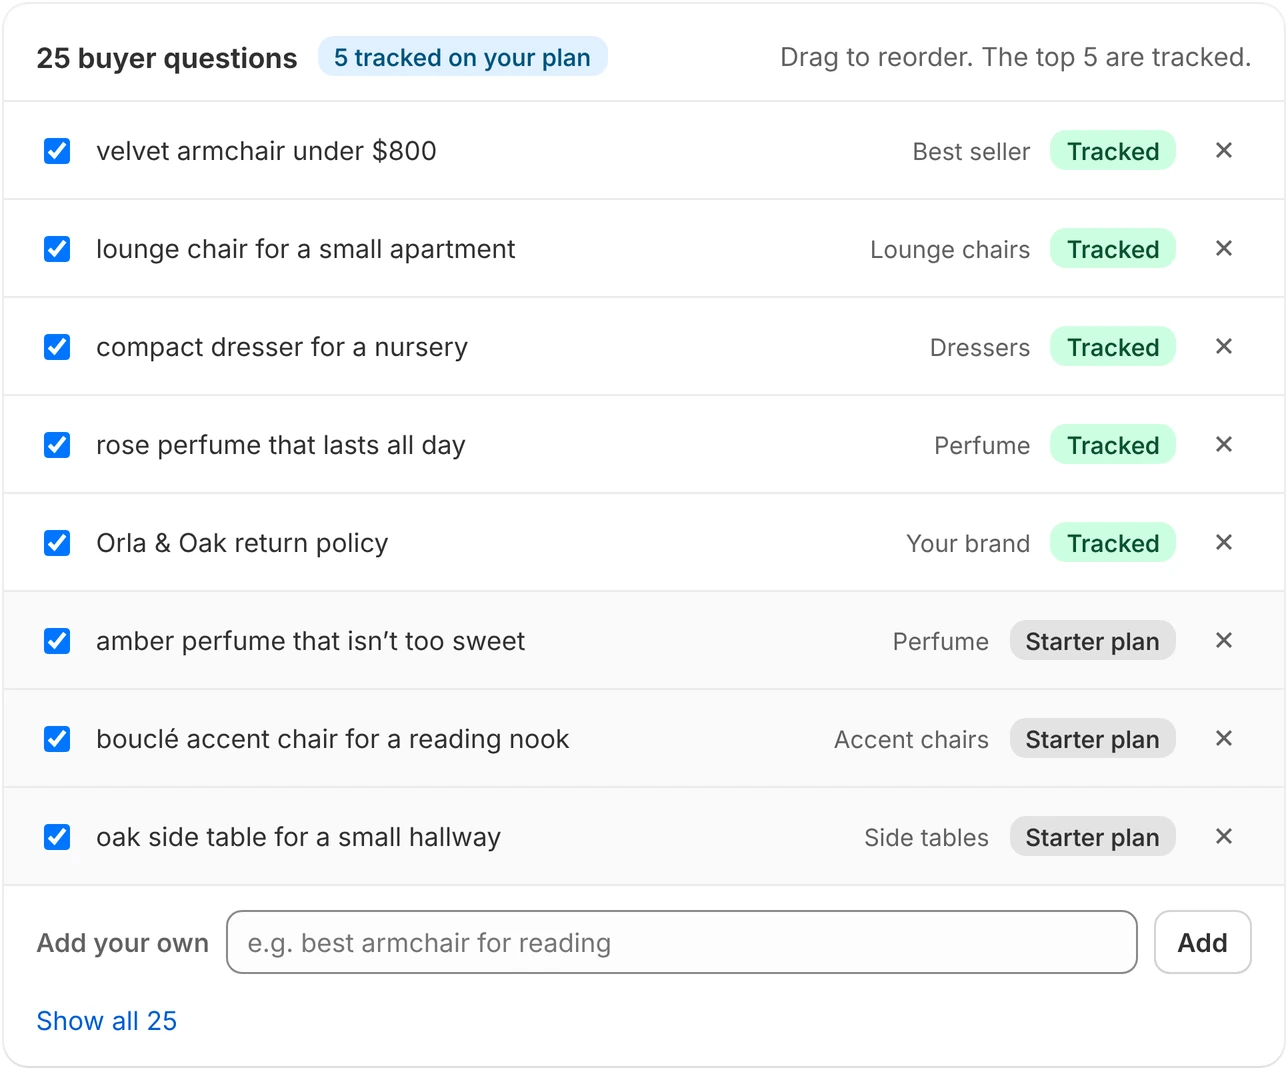
These are the questions Idex asks AI assistants for you, built from your best sellers, product types, collections and brand. Your plan tracks the ones at the top of the list.
- Drag a question to move it up or down.
- Untick any you don’t want asked, or press × to remove it.
- Add your own in Add your own.
Then press Save and continue. Most stores keep the list as it is.
Step 5: Approve your first fix
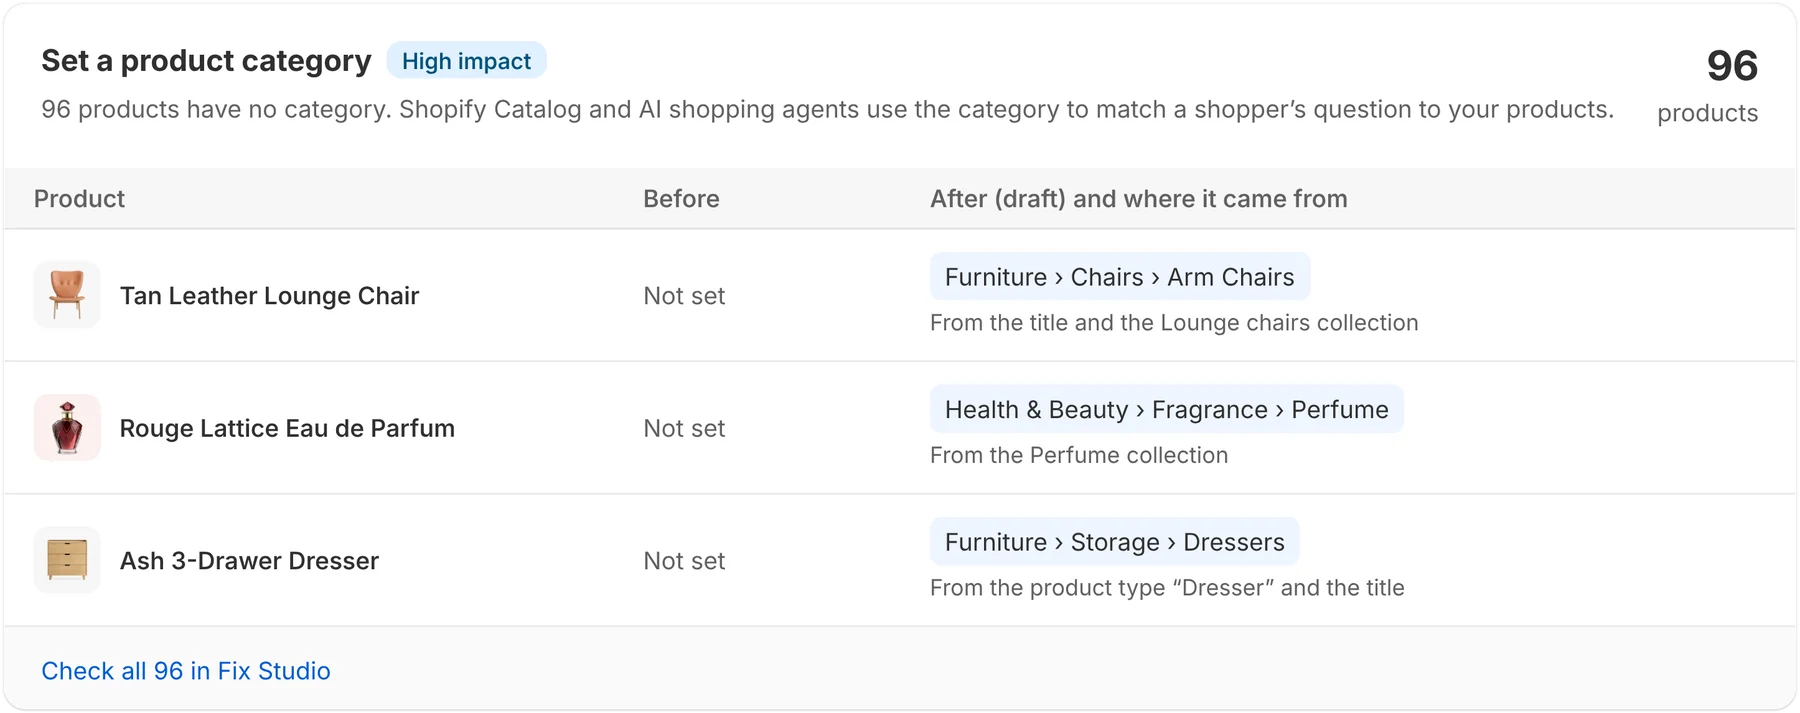
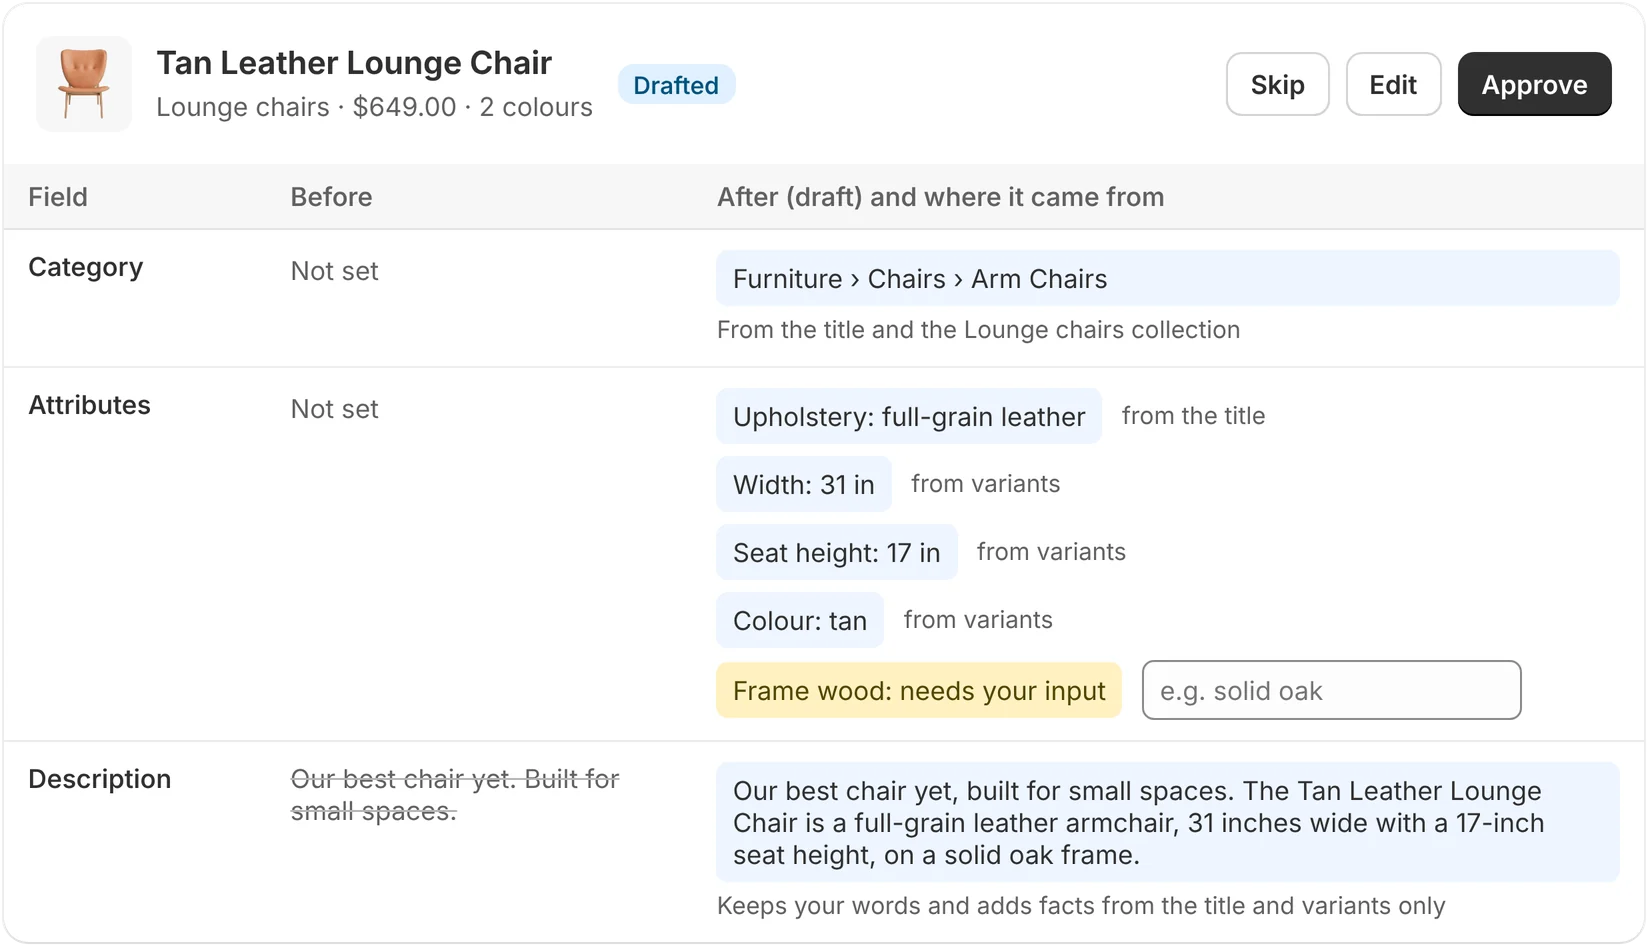
Idex picks the quick fix that covers the most products, like setting a missing product category, and shows a few of them before and after, with where each value came from.
Press the approve button to apply it, or Review in Fix Studio to check every product first. If the fix covers more products than your plan has left this month, Idex approves your best sellers first. Original values are saved, so you can undo it.
Step 6: Work through Fix Studio
Setup ends on Home. From there, open Fix Studio to see every drafted fix: categories, attributes, descriptions, SEO titles, FAQs and alt text.
- Check each draft and where its values came from.
- Fill in anything marked Needs your input.
- Approve one product, or select many and approve them together.
Changed your mind? Use Undo in Fix Studio’s undo history, which lists your 20 most recent approvals.
Step 7: Check AI Visibility after Monday
Idex asks your buyer questions every Monday (UTC), or on the first Monday of each month on the Free plan. The first check is on the Monday after your question list is created.
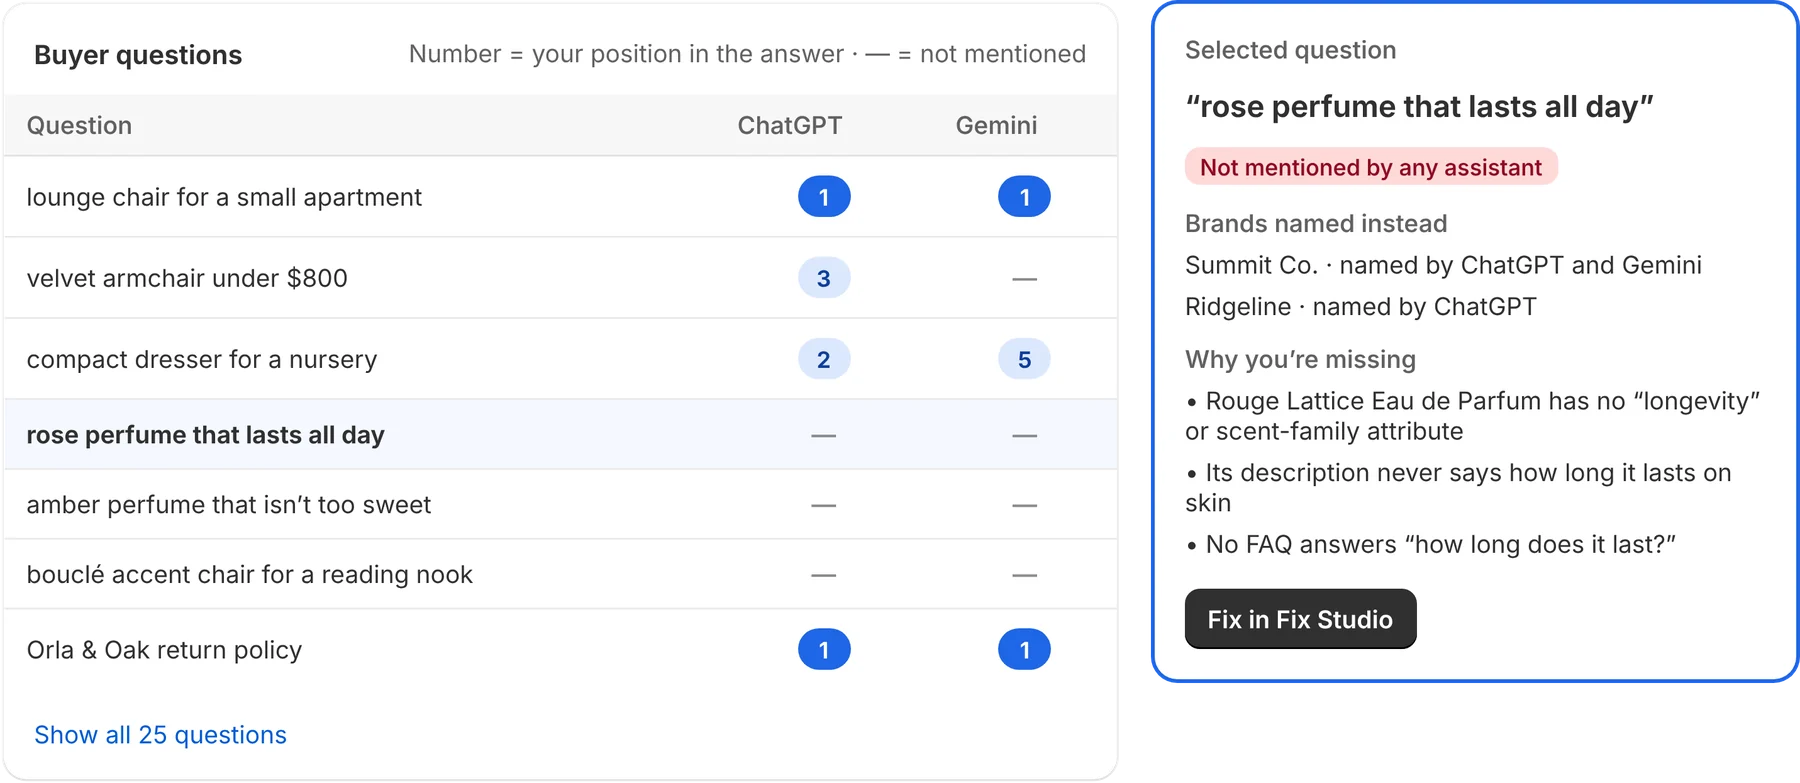
After it runs, AI Visibility shows for each question whether ChatGPT (and Gemini, on paid plans) mentions your store and in what position, which brands it named instead, and what could move you up.
Step 8: Watch your AI revenue
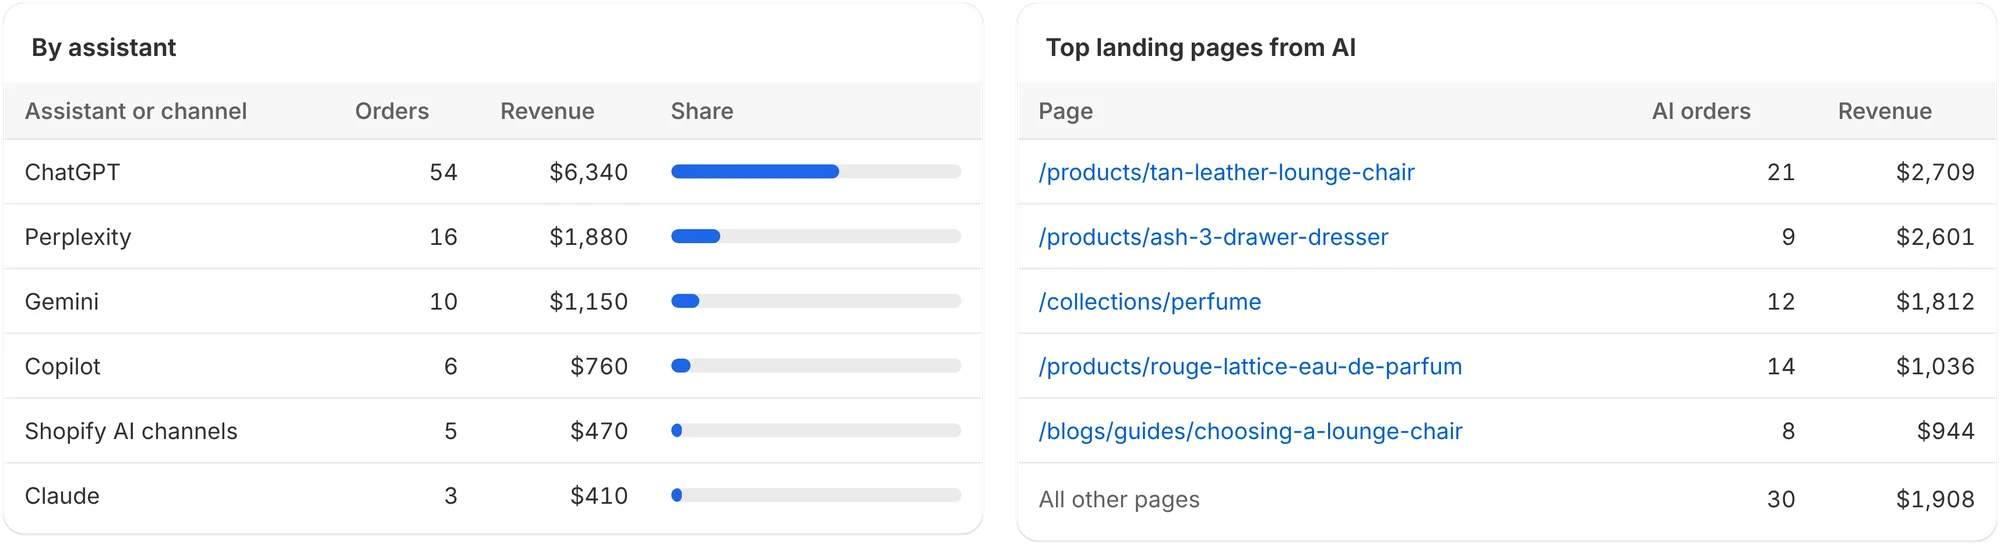
AI Revenue lists the orders that came from AI assistants, found in each order’s customer journey, with revenue by week, by assistant and by landing page. New orders appear as they’re placed. There’s no tracking code to add.
Step 9: Let AI crawlers and Bing in
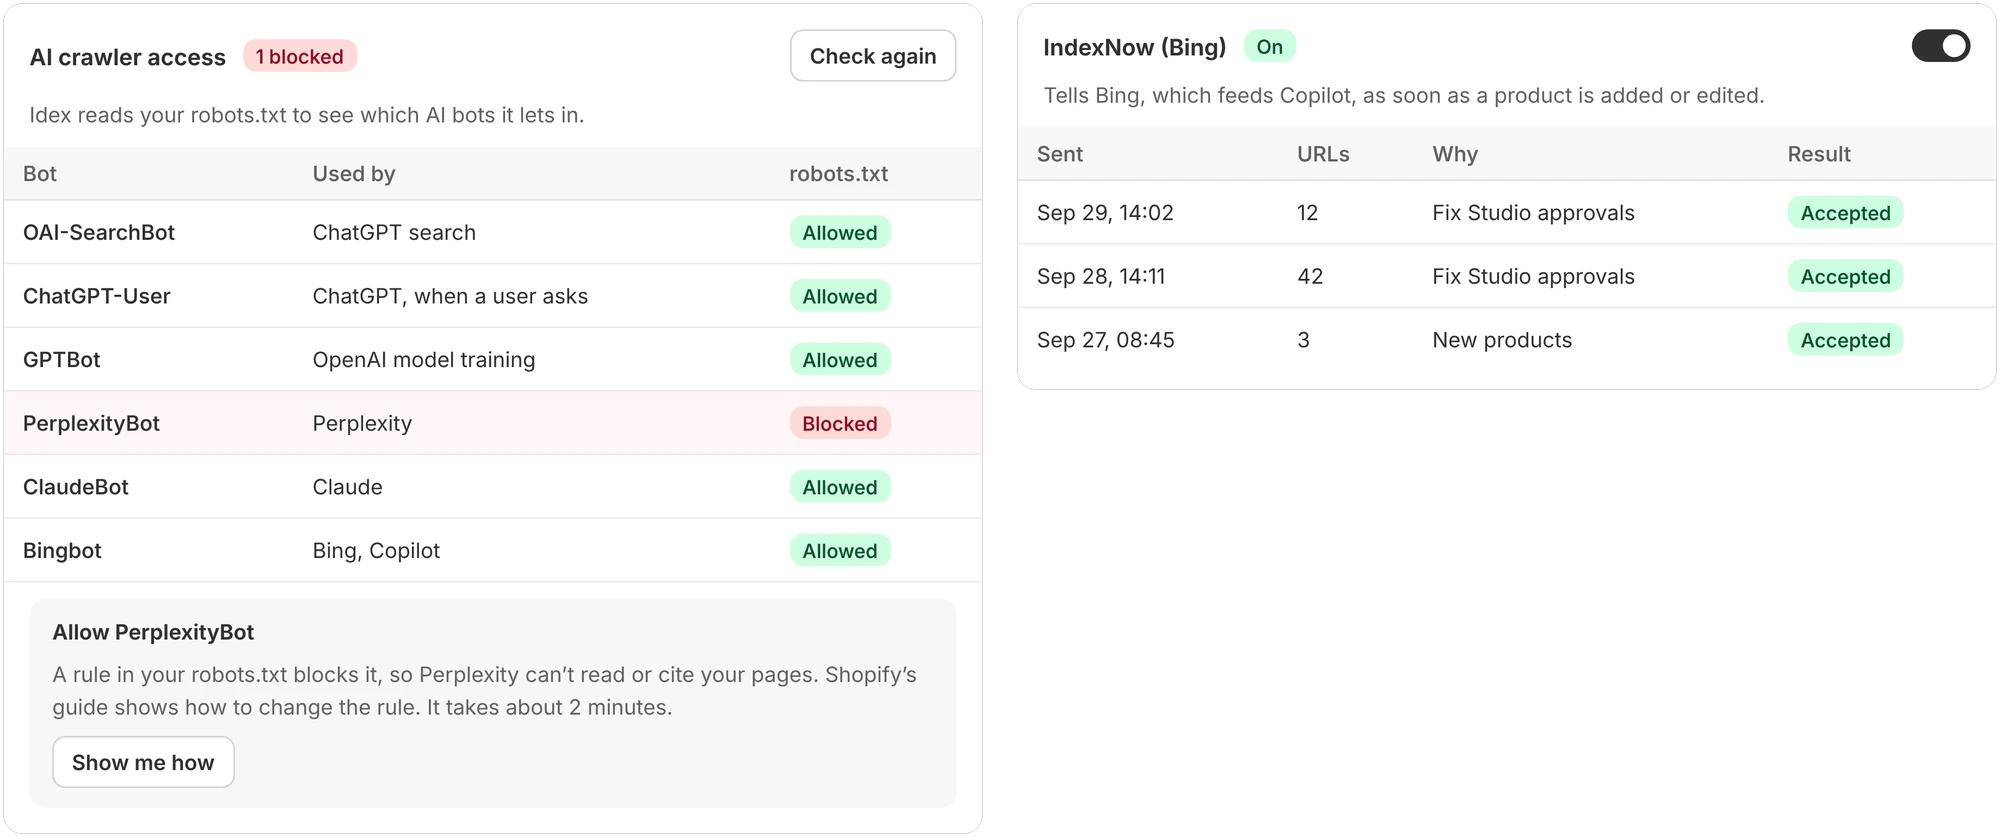
On Schema & AI files, check which AI crawlers your robots.txt lets in. If one that assistants use is blocked, Show me how opens Shopify’s guide to changing the rule.
IndexNow is already on. It tells Bing, which feeds Copilot, when a product is added, edited or fixed, and the card shows what was sent.
That’s it
Idex keeps working in the background: it scans your store every week, checks new orders as they come in and asks your questions on schedule. Open Home to see what changed.